One sunny morning coming soon, you’ll feel an irresistible urge to plant your garden. Before you pick up a trowel or open a seed packet, check out these hints to help you succeed.
Transplanting Seedlings
Whether it’s a flat of bedding plants from a nursery or seedlings started indoors, you don’t want the transition from pots to garden bed to induce transplant shock. The first rule of thumb is to watch where you put your thumb. “Never pick up a seedling by the stem—it is the plant’s lifeline,” cautions April Johnson, staff horticulturist at the Rodale Institute, near Kutztown, Pennsylvania. Always handle seedlings by their leaves. “Leaves will grow back,” Johnson says.
Hardening Off
Hardening off gradually introduces seedlings to the conditions in your garden. Bring all seedlings—store-bought and homegrown—outdoors and expose them to a steadily increasing amount of sun, wind, and temperatures lower or higher than what they were used to indoors. This will take about 2 weeks. Don’t rush it.
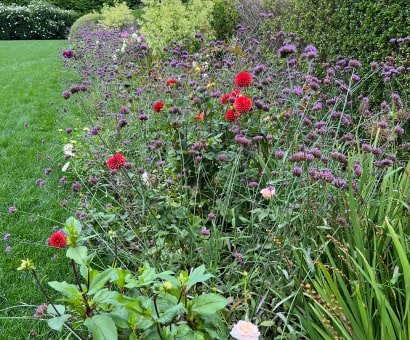
 When to Plant
The ideal time to plant is when it’s overcast, with rain in the forecast and no frosts or heat waves expected. If conditions don’t cooperate, then try to plant in the late afternoon or early evening to minimize the time the seedlings bake in the sun. The day before planting, water the plants so that the soil in the pots is moist.
In the Ground
Keep your seedlings in the shade until you’re actually ready to plant each one. Don’t pull a plant out of its container until you’ve dug the hole for it. If you can’t easily pull it out of its container by the leaves, hold the pot in one hand, flip it upside down, and give it a sharp tap on the bottom. The rootball should slip out into your other hand. Snip away any damaged roots with scissors or pruners. If the roots are a solid mass, gently tease some away from the center, trying not to break them.
Carefully slice into peat or newspaper pots with a knife to give the roots an escape hatch in case the pot doesn’t break down quickly. Once the pot is in the ground, tear off any part of it that extends above the soil line. It will dry out and pull moisture from the soil.
Plant the seedling at about the depth it was in the container, or a bit deeper. If your soil is cold or very wet, planting too deeply could rot the stem. But plant tomatoes quite deep. Studies by the Southwest Florida Research and Education Center, in Immokalee, Florida, showed that tomatoes planted up to their first set of true leaves set fruit earlier, and yielded more and larger tomatoes, than tomatoes planted at rootball level. This held true when the studies were repeated in the colder soils of Ohio and Massachusetts.
Firm the soil around your seedlings, but don’t press so hard that you compact it. Give each seedling a thorough watering.
The First Days
Your seedlings have become established when you see healthy new growth. This can take a few days to a week, depending on the weather. Wilted leaves or drooping stems can be symptoms of transplant shock. Seedlings can go into transplant shock if they weren’t hardened off completely or if the weather is extreme. Most plants recover in a few days, but until they do:
- Check that the soil is firmly around the plants so that no air pockets are drying out the roots.
- Protect the transplants from sun and strong winds with row covers, sheets, or cloches.
- Water only if the top inch of the soil is dry. Don’t water if the soil is already wet; it won’t help.
In The New Seed-Starters Handbook (Rodale, 1988), author Nancy Bubel recommends waiting a week to 10 days after transplanting before fertilizing your seedlings. They will have sent out new feeder roots by then and will be entering their most active stage of growth.
Direct-Sowing Seeds
How hard is it to put a seed in the ground, anyway? Not hard. Nature does it all the time. But of the thousands of seeds a plant may release, only one or two might germinate and grow. Hedge your bets by not planting every seed in the pack. If any seeds don’t sprout, you’ll have extra to fill in the empty spaces.
Planting Depth
Plant seeds too deeply, and they may never germinate. Plant them too shallowly, and the topsoil might dry out during germination. Generally, you can plant a large seed at a depth equal to three times its diameter (not its length). Seeds of peas, squashes, and sunflowers and those of similar size are considered large seeds. Plant smaller seeds about 1/8 inch deep. The seed packet will give the proper planting depth for that particular seed. Some seeds need light to germinate, so you can’t bury them. Either sift fine soil over them or leave them uncovered. But make sure the seeds make firm contact by pressing them into the soil.
To Hill or to Mound
Most gardeners sow seeds in rows—seeds spaced evenly in a line. But another way to plant seeds is in hills. When a seed packet recommends planting in hills, it means planting them in a cluster—not necessarily in a mound, as you might expect. Mounding the soil is optional. Cucurbits are often planted in elevated hills, because they need warm soil and good drainage.
Squash and melon expert and author Amy Goldman, in Rhinebeck, New York, plants her cucurbits in flat hills. She’s found that raising seedlings above the surrounding soil level causes them to dry out too quickly. She suggests mounding only if your soil is compacted or waterlogged. Jeremiath Gettle, owner of Baker Creek Heirloom Seeds, in Mansfield, Missouri, skips hills entirely and simply plants his cucurbit seeds in rows. He advises gardeners who plant in elevated hills to check the seedlings after a heavy rain to make sure the soil hasn’t washed away from the roots.